EDTC 300 Summary of Learning

Here is my video project for the summary of learning in EDTC 300. I’ve provided a written version below as well.

Hello! My name is Haley Begrand and today I will be talking about my experience in EDTC 300 at the University of Regina and my main takeaways from the course.

Digital Community

I think that the 2020/2021 school year was the perfect time to take EDTC 300. With the current state of the pandemic and being in full-time online schooling, I was able to experience building a digital community firsthand. I haven’t met any of my classmates or mentors in person yet, but with the help of various online platforms, I have still been able to connect with them and build friendships! Virtual learning for extended periods of time can really take a toll on a person’s mental health, so it is extremely important that we work to develop these strong online communities. Whether it was through our blogs, Twitter, or Slack, my experiences in EDTC 300 taught me so much about digital communities. I have learned about so many tech resources that I can use to build a digital community in my classroom, such as WordPress class blogs, Google Classroom, Kahoot, See Saw, EdPuzzle, Quizizz, and so much more.

Twitter & #SaskEdChat

Twitter in general has been a great way to connect with others and share resources. I have developed a resourceful Twitter feed by following users whose interests are relevant to mine, consisting of other University of Regina education students; new and veteran Saskatchewan teachers; and authors, scholars, and professors within the education community. More specifically, Sask Ed Chat in particular has been extremely resourceful for me as a preservice teacher. I have met some wonderful local educators each Thursday night who have been kind enough to share countless resources and amazing advice. Participating in Sask Ed Chat is something I aim to continue beyond this course, at least when I don’t forget about it!

Blogs

I’ve always been passionate about teaching, but I don’t have many people in my personal life that are willing to hear me ramble about it! Thankfully, because of EDTC 300, I was able to express my thoughts and ideas about teaching through blogging. Even after this course comes to a close, I would like to maintain my presence on my blog. I’ve already got plenty of posts in my drafts just waiting to be published! Aside from blogging, my website serves as a professional digital portfolio where I can demonstrate my achievements and professional work experiences. I have created an “about me” page, as well as some tabs for lesson plans, resources, and university course work. Working on my blog has given me a means to examine my progress and growth over the semester, and I can’t wait to see how this evolves throughout my teaching career.

Digital Fluency

One of my favourite points from Mike Ribble’s Nine Elements of Digital Citizenship is digital fluency. In one of my weekly blog posts, I chose to connect digital fluency to mathematics by examining misleading graphs and discussing the concept of fake news. Ever since I wrote that post, I have discovered that I am really passionate about this topic. I have come up with quite a few lesson plans and ideas revolving around teaching digital literacy through mathematics, and I really look forward to putting them into practice in my own classroom someday. With the world of technology evolving every day and fake news being spread more easily than ever before, I think it is crucial that we teach our students how to be digitally fluent and literate.

Digital Identity

After much discussion around digital identity throughout this course, I have taken some time to evaluate my own identity online and refine it the way I want. As teachers, we are role models for our students inside and outside of the school. Not only is it important that I display professionalism, respect, and responsibility online, but it is also important for me to stand up for what I believe in and be an activist and an ally for others. I am very passionate about issues surrounding feminism & toxic masculinity, LGBTQ+ rights, environmental consciousness & sustainability, and anti-racism & reconciliation. These are issues that I have begun to post about on Twitter and plan on discussing in relation to education on my blog in the near future. One of my favourite unofficial quotes is that “social change begins with education”, and it is one of the reasons I decided to become a teacher.

Ed Tech!

Lastly, Ed Tech is something I have grown to appreciate more and more as the semester went on. The SAMR model really opened up my eyes in terms of reflecting on the intention for integrating technology into the classroom. If I had to choose one thing as my major takeaway from the course, this would be it. Whenever I see an Ed Tech resource and think about how I would use it in the classroom, I think of where it would fit on the SAMR model. It is a great tool to make sure you are using technology for the right reasons. Because of this class, I also learned that it is no longer a choice, but a responsibility, for us to teach our students how to be safe, smart, and kind online. Thanks to EDTC 300 and everyone involved, I have learned so much about digital citizenship, and I will take it all with me through the remainder of my teaching career.

Contributing to the Learning of Others in EDTC 300

In EDTC 300, we worked really hard at building a strong community within our virtual class. Having never even met anyone, I can still honestly say that I have made some long lasting friendships through this course. In this post, I’ll go over my course contributions on the three major platforms that we used to interact on: course blogs, Twitter, and Slack.

Course Blogs

When it came to commenting on my classmates’ weekly blog posts and learning project journeys, my number one goal was to be as genuine as possible. Even though we had to do this as part of the course, I wanted to make sure my peers knew that I actually did enjoy reading what they had to say and that I was excited to follow along with them.

When I commented on blogs, they were usually pretty lengthy, especially when I had a personal connection to the topic! I loved reading about Maya’s experiences with learning French, which is a language I speak fluently. Sequoia’s adventures in crocheting were so fun to follow because I crochet too! I connected with Trista often throughout the semester about jewelry making; she ventured into wire rings and hair pins (which turned out beautifully – I loved seeing her new creations each week) and even dabbled in clay, which is the medium I work with! Both Caelyn and Cyandra dove into digital art, and it was absolutely astonishing to see their artwork evolve over the semester!

Here is a slideshow of some of my most meaningful interactions on others’ blogs:

I also made it a priority to respond to comments that others left on my own blog posts. Sometimes they would have a question for me, or maybe just a kind comment or suggestion. I always wanted to let the person know that I appreciated their comment and that they took time out of their day to read my blog. I understand how busy our lives can get, so it always warmed my heart when someone chose to read my posts!

Twitter

It was so much fun to develop a presence on Twitter for this class. I will most definitely be staying active on my Twitter account even after this course is over because I have connected with and learned from so many amazing people. You can read about how my feelings for Twitter evolved in this blog post I wrote.

This is my favourite thing I’ve Tweeted thus far because I got so many incredible recommendations. I urge you to check it out if you’re looking for some math education books to add to your personal library.

There are some true geniuses on Twitter sharing great activity and lesson ideas; I loved retweeting them to share with my classmates.

Lastly, sometimes I just had thoughts to spill about education related topics that I’m passionate about. I had so many wonderful responses to these Tweets, and it was really nice to have discussions with others about the issues.

It was also great replying to others’ tweets from time to time! Whether it was giving a recommendation, answering a question, or simply hyping someone up about their awesome learning project, it was so fun interacting with my classmates. Here are a few of my favourite interactions on Twitter (click the photos to enlarge them).

I have also participated in multiple Sask Ed Chat sessions, which I thoroughly enjoyed! It was a fantastic way to connect with other local educators. I have received countless tips and words of advice from them, and I am so grateful for that!

This was my favourite week of Sask Ed Chat! See the Extra Contributions section of this post to learn why.

I often used the #EDTC300 hashtag (when I remembered to!), along with the occasional #skedchat, #edchat, #mathed, #mathchat, #MTBoS, #problemsolving, #digitalliteracy, #digitalcitizenship, #edtech, #scienceed, #chemchat, #environmentaled, #gamification, #physicsed, #feminism, #toxicmasculinity, etc… whenever it was relevant!

I worked to create a professional Twitter account with an appropriate profile and header image, as well as an informative biography and link to my blog. You can check out my full Twitter profile here.

Slack

Slack was a great place to ask and answer questions, share resources, and just chat with classmates! I think that one of my most important contributions to the Slack community was my weekly Sask Ed Chat reminders. I tried to send a message each week that I was able to participate. I actually thought I was starting to annoy my peers, but when I forgot to send a reminder one week, Ciera was quick to let me know that my reminders were helpful to her and she missed the chat when I didn’t send one!

Aside from my reminders, I also shared some Twitter accounts to follow, helped out a few classmates with their blog tech issues, and asked for help too! I loved participating in Slack because everyone was always so kind and eager to help each other out.

Extra Contributions

Professional Development Resource Doc

My friend Kassia and I worked at lightning speed one night after a particularly informational Sask Ed Chat to create a Google Doc full of every single professional development resource or recommendation that was suggested by folks in the Twitter chat. There were so many that we couldn’t keep track of them all, and we wanted to create something that everyone could have access to and find the links to everything that was recommended. We shared this with our EDTC 300 classmates in Slack, as well as posting the link to Twitter for everyone to find. I have also added it to my blog here.

Canva for Teachers: Tutorial Mini Series

I noticed many of my classmates were also very fond of Canva and were using it with their learning projects. I was inspired to create a mini series on YouTube where I demonstrate quick tutorials on how teachers can use Canva in and for their classroom! I have each episode posted on my blog here, along with a playlist on my Youtube channel. I am aiming to create more episodes soon, now that I’ve got more time on my hands!

A Final Reflection

I would like to take this moment to thank Katia Hildebrandt and Amanda Brace for not only being great educators and mentors, but for providing all of us with the means to make such strong connections with each other in this virtual classroom. This academic year has been truly painful in more ways than one, but it makes it a lot easier when you have people by your side. Our professional blogs, the Slack community, and Twitter were all fantastic ways for us to get to know each other and build friendships. I hope to eventually meet everyone in person someday!

That’s a Wrap! Final Thoughts on My EDTC300 Learning Project

I’ve crossed the finish line on the learning project! YAY!

Throughout the semester, I was able to connect my EDTC 300 course to my small business by learning a new skill for my learning project that would contribute to the making of my earrings! I tackled polymer clay canes: something I’ve wanted to learn for quite some time, but it always scared me. The Learning Project gave me the perfect opportunity to finally try it out, and I couldn’t be happier with how the journey went.

Week 1: Beginning My Journey With Polymer Clay Canes

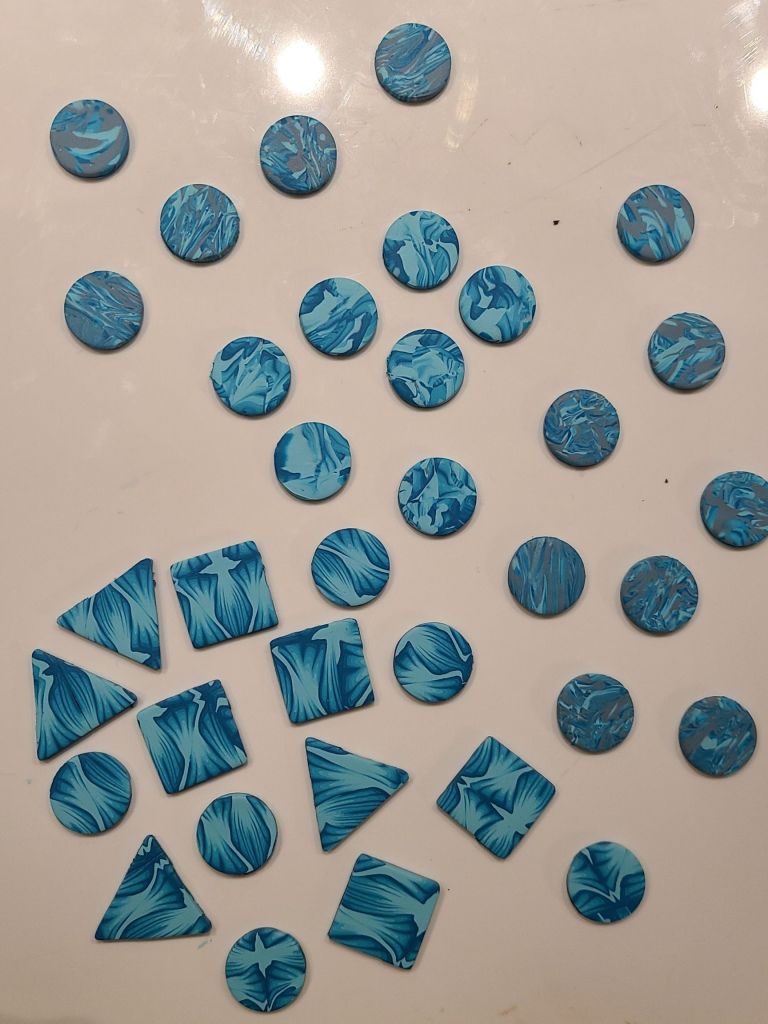
For the first week, I planned out how I was going to go about learning to make polymer clay canes. I noted that I really wanted to try the stained glass effect, and as it turns out, that ended up being one of my favourite ones I made! I planned to create videos and photo collages (which I did!) and make the finished slabs into either earrings or magnets, depending on how successful they were. Sadly, the cane from week 7 never even made it into earrings (I wasn’t too happy with the pattern), and the cane from last week is still a slab sitting under some parchment paper waiting to be cut!

Week 2: An Almost *Too* Successful First Attempt

I was so unbelievably happy after making my very first cane. I followed a fabulous tutorial from The Polly Collective on YouTube for this technique. I will most definitely be making another cane like this in the future. A TikTok by Sigfús Designs about general tips for making polymer clay canes was also really helpful, and I ended up using those tips for every cane after that! After my very first cane, I already noticed some mistakes and things that I should keep in mind when making canes in the future. This included things to do with air bubbles, slicing, reducing, and distortion – all of which I think I improved on a lot over the learning project.

Week 3: Third Time’s The Charm!

Woof, what a tricky one this was. To this day, I have a love/hate relationship with the faux stone technique. For this cane, I learned from an Instagram Live for the first time and reflected on that experience. I was able to try this technique three separate times with modifications to each. It was really interesting to see how the minor changes affected the end result or the overall difficulty of the cane. I pulled some tips from YouTube videos by Jessama Tutorials and Fern&Mitch Handmade for trying the other methods.

Week 4: Let’s Just Call It Claymation!

I actually did two canes for week 4 – the brain cane and the stained glass – and it was extremely successful. Both YouTube tutorials I followed that week were incredible, and the Boogie Bee Jewelry one in particular had some great tips that I ended up recalling multiple times later on in further cane projects. I have also really enjoyed the tutorials by Jessama Tutorials, they are very well done and easy to follow.

Week 5: Trying Something Different: Mini Canes!

Mini canes were such a fun adventure in this learning project! Instead of making one big pattern, I made small components to layer on a flat slab to create pieces like flowers and leaves. I think this was a super important week for my learning project because it opened up my mind to all the possibilities that canes offer. It was all in the small details that week. I only used short TikTok tutorials (blended cane and leaf cane) for this attempt, and only used them as a foundation for my canes. I manipulated the shapes to make them exactly how I wanted so I could replicate the design I had in mind.

Week 6: Mixed Feelings About Instagram… and Leopard Print

This was my first time trying to create a very specific pattern: leopard print. It turned out amazingly and was probably my second favourite cane I’ve made, next to stained glass. In this post, I made a pro/con chart for all of the platforms I had learned from so far. It was really helpful to jot down my ideas concretely to see what resources I liked learning from the best. I also used Canva this week to create an informational poster on the basics of how to create a cane, which was a fun way to demonstrate my learning and make notes of helpful tips I had learned!

Week 7: The Best and Worst Week of the Learning Project

Well well well… the failed cane. This one got turned into magnets. It was a cane that was a lot more complex than I had anticipated, but hey, we learn from our mistakes! I followed a lengthy tutorial from Fiona Abel-Smith PolyOriginals, and found it to be very helpful and detailed. I documented my learning through several collages of photos that I took throughout each step of the cane-making process. Sometimes video editing can feel daunting, so it was nice to just snap a few pictures when I was feeling overwhelmed with work.

Week 8: Back to Basics: Cane Reducing!

It was important for me to take a step back this week and focus on improving the basic skills instead of jumping into the complex patterns. Reducing was something I struggled with the week before, so I really focused on it with my lace cane. I followed a short YouTube tutorial with no verbal or written instructions, so I just had to go off the video itself. Being a somewhat experienced cane maker at that point, I knew of some tips and tricks for making the cane successfully, but as I discussed in the post, I would not recommend the video to a pure beginner.

Week 9: Creativity + Growth = Learning.

In my very first learning project post, I mentioned something along the lines of – “maybe someday I’ll end up creating my own cane design”. Well, past Haley, you did! In the final week of the learning project, I created my own repeating pattern in a cane. It was important for me to try something on my own, even though I used a TikTok tutorial as a basis, I needed to create from my own artistic perspective.

Must-Watch Resources for Beginner Polymer Clay Cane Making

Here is where I learned the most from:

Top 5 Tips That I’ve Learned

  1. You will need a tissue blade (or kitchen knife) and a pasta machine (or depth guides). These tools will make everything a whole lot easier.
  2. Put your cane in the freezer for at least 5-10 minutes before you slice it. Do this as often as possible, in fact, do it any time you have to slice it if you can. It will help solidify the clay to give you a cleaner cut and minimal squishing, smearing, or distortion.
  3. Place slices on top of a thin base layer of clay when you’re laying out the slab. This will help everything stick together easier when you’re rolling the slab out.
  4. Use something flat that has a large enough surface area to help you reduce a cane into a square shape. A hand roller will help with this too.
  5. Square canes are easier to lay out into a slab compared to circles. Circle slices have to overlap in order to fill up the space, whereas squares nestle in together nicely. Other nice shapes are hexagons and triangles, but I find squares to be the easiest.

My Future With Cane Making

I am certain that I will continue making polymer clay canes, and I am still determined to learn those complex kaleidoscope canes someday! I learned so much over these last ten weeks, and I can’t wait to try out more canes as well as perfect my technique on the ones I’ve already learned.

Ready to Receive My CS Degree Any Day Now…

I feel like a computer science genius after playing around with some elementary-level coding games. This week in EDTC 300, we were instructed to take a look at Scratch, Code Academy, or Hour of Code on code.org to try out some basic coding.

I surfed code.org and ended up finding an activity where you could animate your own Google logo!

Google Logo activity from code.org.

I have zero experience with any kind of coding whatsoever. Like my friend Caelyn Hembroff, I also knew somebody studying computer science at university, and seeing their homework made me feel a lot of pity and sympathy for them.

I was intimidated when I learned that we would be doing coding this week, but little did I know that coding can be simplified to actually be doable for younger students!

Code.org made it relatively easy to figure out how to code basic animations. It’s a little bit mind-boggling to me that this activity is aimed for grade 2 and up, because even as a 19-year-old university student, I still found it quite tricky! I tried my best to watch the provided videos and be creative, but I think coding is just something I can’t quite wrap my head around yet. After all, this is only my first time trying it, so I’m sure that could change with some practice.

Here’s a quick time lapse of me creating my animated Google logo:

I thought the activity was intriguing because I always love seeing the different Google Doodles, so it’s pretty awesome that you get to learn how to make one on your own! I personally don’t find much enjoyment in the actual coding itself. I find it pretty frustrating and it just isn’t something that interests me a whole lot.

What about coding in schools?

In my mind, coding isn’t something that is absolutely essential to be taught since it isn’t really an everyday skill that everyone is going to use. However, I think it is most definitely an awesome thing to integrate into lessons if you’re looking to make things a little more interesting for your students. For example, I believe it was my classmate Patrick Dishington that suggested using coding activities in an English class as a means of practicing forming sentences & sentence structure, as well as following/giving instructions!

Another peer of mine, Tina Bowley, mentioned using coding activities in mathematics (which you know got me so excited). I can connect this idea to the specific activity I did! With the Google logo, you can animate each “sprite” (each letter in this case) to do different kinds of movement: translations, rotations and shrinking/enlarging. This would be a neat activity to do with your mathematics students when it comes to transformations of functions (which is covered in PC20 and PC30 of the Saskatchewan mathematics curricula).

Both of these lesson ideas would be great for incorporating your students’ interests into their work if you have students that like coding/video games/computers/etc.

I want to know your thoughts on coding! Do you find it enjoyable? Do you think it should (or could) be taught in schools? What are some of your ideas for incorporating coding into lessons, for any subject? Let me know in the comments or Tweet me!

Creativity + Growth = Learning.

Up until this week, all I’ve done is try to replicate the same exact pattern as someone demonstrates in a tutorial. I wanted to unleash some creativity and try something new.

I saw a TikTok of a Spanish tile inspired polymer clay cane (see below), and decided to use it as a foundation for my own cane. It ended up being a very go-with-the-flow kind of process as I was making it. It didn’t end up looking like the cane from the TikTok, but that was the whole point of this week – to make something on my own.

I was able to combine lots of ideas I learned over the course of the learning project into this cane. I used the same tip from Boogie Bee Jewelry (I talk about it in more detail in this blog post, and this one too) that has proven to be very helpful when it comes to wrapping plugs in thin sheets of clay. It was a good thing I focused on reducing last week, because the practice came in handy! This cane involved a lot of it!

The finished slab:

Bonus: here’s a satisfying video of me slicing the cane!

Creativity and freedom is essential in learning!

Part of learning a new skill is learning to make it your own. I’ll compare it to learning a new instrument: say, I started learning to play the piano because I wanted to learn how to play Sign of The Times by Harry Styles. I’ll practice and practice playing Sign of The Times, but eventually I’m going to want to play other songs and maybe even come up with some of my own melodies.

The same thing goes for our students. We don’t teach them specific skills and concepts just for them to practice them over and over again and then forget about it. We guide them and help them build up a toolkit for them to use at their disposal over the course of their life. Going back to the our comparison – it’s like learning to play the piano and then later on, using your skills to play a few riffs at a party to impress your friends.

So this week I took my toolkit full of tips and tricks I have learned over the last weeks of this learning project and used it to create something on my own! I am pretty proud of how it turned out given the fact that I had no initial plan. It is so important to bring creativity and expression into learning, because without it, we are nothing but receptacles for information that we gather and regurgitate when it’s needed. When we are free to use our own ideas and create things ourselves, that is when we truly learn.

Fake News and Misleading Graphs: Digital Literacy in Mathematics

My post from last week about digital citizenship and Mike Ribble’s Nine Elements, I briefly touched on the concept of digital fluency and fake news. More specifically, I talked about how graphs in the media can sometimes be misleading, and how we need to educate our students on how to decipher whether or not the data represented in the graph is depicted accurately. Fake news is becoming more and more common, so let’s talk about it in more detail.

For starters, how can graphs be misleading?

In the following TED-Ed video, Lea Gaslowitz explains how graphs can be sneakily manipulated in the labels, numbers, scale, and context.

Now, why do we need to teach students about digital literacy in mathematics?

We often say that statistics, numbers, and graphs don’t lie – that the very nature of mathematics is that it is truthful and invariant. The sad fact of the matter is that that is simply false. While the actual data collected may be accurate, the way that it is represented can completely skew and distort its meaning.

In mathematics, we help our students build a toolkit for themselves full of mathematical concepts that they can pull out of their belt at any time later on in life. One of the tools we need to give them is digital literacy with respect to mathematics.

Photo by Joshua Miranda on Pexels.com

Statistics is persuasive and can be heavily biased. Mark Liddell illustrates this idea very well through an example. We must take into consideration the context of the data in order to justify its validity. The danger of graphs is that since they are a visual aid, they can be extremely convincing (hence “graphs don’t lie”). But this danger goes beyond the visuals. Even simple statements like the one used in Mark Liddell’s example can, at first glance, seem obviously true. Bias comes into play from both parties – the provider and the recipient of the information. We have to teach ourselves and our students to be aware of bias: How would the provider benefit from this data being published? What corporations or organizations would benefit from this, and do they have an influence? We have to think of our own internal bias as well. It is much easier to believe a statistic when it correlates with our personal beliefs and ideologies.

In an increasingly populated digital world, we have to educate our students about fake news. Fake news is becoming more and more abundant due to the very nature of modern technology. News travels faster now than ever before, making it even easier for fake news to slip its way in. I highly recommend watching this TED-Ed video, and with your students too, to learn more about how fake news is spread so easily. Furthermore, in a digital society that places so much value on views, clicks, likes, subscriptions, comments, shares, etc., there is an overwhelming amount of content on the internet called clickbait (what’s clickbait?). Check out this video to learn more about how to spot it! This entire TED-Ed YouTube playlist is extremely resourceful when it comes to digital literacy.

What should I teach my students in regard to digital literacy?

First, we need to explain why fake news is bad, and why wee need to be digitally literate (see above). Then, we need to actually teach them how to do this!

This article gives some tips for evaluating and assessing the validity of sources:

  • Look at the URL or site name: Is it trying to look like something it’s not?
  • Inspect the images: Keep an eye out for photoshop mistakes, try a reverse image search in Google.
  • Verify the author: Search them on social media (being verified does not mean there is no bias!)
  • Check citations: Where is the author getting their information from? Track down the original source, search quotes in Google.
  • Read the comments: What do other readers have to say? Did they notice something fishy? Maybe you misunderstood the message of the source, is it merely a satire?

And when it comes to visuals, like graphs, the TED-Ed video above explains to:

  • Look at the labels: What do the title and axes labels tell you about this graph? Does it make sense?
  • Check the numbers: Do they add up?
  • Examine the scales: Are the intervals equal? Does it start at zero?
  • Consider the context: Is there missing information? What other factors that were not considered could have affected these results?

How do I go about teaching this to my students?

Photo by Lukas on Pexels.com

One of the most helpful and engaging ways to have your students learn about fake news is to actually put it into practice. This article suggests bringing in real-life examples of fake news into the classroom and examining them together. Here are some quizzes that you can do with your students as a little game to see who can identify fake accounts, headlines, etc.

Can You Spot the Fake News Headline?

Spot The Troll

Break the Fake

Factitious

You can also show your students some examples of misleading graphs and ask them to identify how and why the data is being misconstrued.

Does this even align with the math curriculum?

YES. Absolutely it does! Let me briefly show you how.

Elementary

Each grade level in the elementary Saskatchewan mathematics curriculum has a Statistics and Probability unit (SP#) in which the topics I’ve discussed in this post could be applied in a range of depth. Some topics may not be suitable to be discussed at such great lengths with younger students, but being aware of fake news is still very important and should be brought up.

Mathematics 9

The entirety of the Statistics and Probability unit (SP9) applies to this topic! The words bias, language, ethics, and society are explicitly used in this curriculum.

Foundations of Mathematics 20

FM20.6 and FM20.7 deal with statistical concepts and can be easily connected to assessing validity of statistical data.

Foundations of Mathematics 30

FM30.4, FM30.5, and FM30.8 all deal with probability and statistical analysis, and could easily be connected to discussing fake news and digital literacy. I can particularly see outcome 5 bringing up a conversation about correlation vs. causation 😉

Start talking to your students about digital literacy in mathematics. It is such a great way to apply math to “real life” scenarios and engage them in seeing the applications and implications of statistics on society.

*Cyber-Sleuthing Badge Acquired*

I channeled my inner Liz Keen this week for an activity in my EDTC 300 course. Any other Blacklist fans out there?

This week we were challenged to pick a partner, my friend Maya Rosenberg graciously obliged, and cybersleuth each other – AKA internet stalk them in a completely normal and not creepy at all sort of way…

As I was perusing through Maya’s socials, websites, and articles written about her, I was very impressed with her professional digital identity. This made me reflect on my own digital identity and what it says about me as an individual and as a professional.

Having Multiple Digital Identities is Normal!

In this article, Nicole Lee talks about how having more than one online identity is actually more common than you think. This was easy for me to believe since I, myself, have multiple accounts on certain platforms. For example, on Instagram I have two accounts – one private account for my personal life to share updates with friends and family, and the other is my business page for my polymer clay earring shop. Like Nicole says in her article, the main reason I have separate accounts is because the audiences are very different. While sometimes the audience overlaps (like my close friends that also love to see my creations), the intent and purpose of each account differs.

Digital Appearance

There is a lot that you can gather from a person based on their social media presence. With Maya, her online presence reflected a great passion for the arts and art education (especially within her community!). This tells me that Maya is driven, creative, and deeply connected to her community. When I look at my own digital identity/identities, I also see some of that reflected in myself. A lot of the content I share is related to supporting small businesses (something I am very passionate about, being a small business owner myself), art, science, education, etc. with the occasional dog/cat post. I would like to think that my own digital profile represents some of my most cherished values and beliefs. At least, this is what I try to keep in mind when I share and post to social media.

Cyberbullying

Photo by Thought Catalog on Pexels.com

On the other side of the screen, I know that a person’s experiences with social media can greatly affect their relationship with it. As someone who was cyberbullied in high school via Snapchat, I am now very inactive on the platform. I only use it, if at all, to talk with some of my closest and most trusted friends. I don’t add people that I barely know, and I rarely interact with anyone besides a handful – maybe 3 – people.

In a way, by being a small business owner, I am forced to be active on Instagram. I don’t mean that in a harsh, unwilling type of way. Instagram is such a great platform to grow a business on, and it is important to keep up engagement to draw in new customers. I post on this account every day or every other day, sometimes even planning out what content I will post up to a week in advance.

My business Instagram account, @redlilyclayco. Profile picture drawn by Caelyn Hembroff of @printsbycaelyn!

This is a whole different situation compared to my personal account. You’d be lucky to see me post on there more than twice a year. There are a few factors that go into why I operate this way. For one, I am often exhausted from posting on my business page to even think about posting to my personal page. Secondly, I don’t have much that I feel the need to share so often. Third, there is still my experience with cyberbullying that has almost tainted my relationship with social media in general. It’s not a fear type of thing, more so a lack of desire. I don’t have much motivation to post on my personal Instagram, and I think that’s totally okay.

I see this mirrored in Monica Lewinsky’s story about her experiences with cyberbullying and online harassment that eventually led to severe mental health battles. At the beginning of her speech, she speaks of being absent online for nearly a decade due to the trauma she endured throughout this experience. It really goes to show how a person’s experience with social media greatly affects their relationship with it.

Catfishing

A negative relationship with social media doesn’t necessarily have to stem from cyberbullying. Victims of catfishing – and here I don’t mean the ones being catfished, I mean the ones who are having their photos and/or identities being used by catfishers – can develop not-so-great relationships toward social media. Katia Hildebrandt discusses in this blog post through a rollercoaster of a story about the true difficulties that can arise from having your identity used by catfishers and the damages it can cause.

The feelings that come from these traumatic experiences such as cyberbullying or catfishing can lead a person to feel less inclined to post on social media. Perhaps it comes from a true place of darkness, sadness, fear, or maybe just an eased feeling of detachment from the negativity of the digital world.

How do you perceive your relationship towards social media? Let me know in the comments, or Tweet Me!

Back to Basics: Cane Reducing!

Last week’s attempt at a polymer clay cane, while many lovely people said it turned out nicely, was kind of a flop for me. I think I got myself caught up in trying to make it look exactly like the result in the tutorial, and that did not end up happening. I was feeling a little down about making canes after that. I didn’t feel much motivation at all to do my next learning project attempt. To try and get myself out of this rut, I decided I would take a few steps back and examine some of the basic techniques and try to polish those instead of jumping into making complex patterns.

I struggled last week with reducing, so I wanted to really dive into a simpler cane where I could practice reducing. I chose a lace cane, which is similar to my stained glass cane but with a lot more reducing. Here’s how it went:

I actually used the same tip from Boogie Bee Jewelry that I talked about in my stained glass cane post! It was really helpful, once again.

This week’s learning resource

The finished effect! Translucent clay is magical.

I chose to follow this tutorial on YouTube to guide myself through making the lace cane. This tutorial was very different compared to the one I followed last week; it was much shorter, there was no dialogue, and the video was sped up. Now, not all of those qualities are bad! The short length of the video was actually nice for my current skill level – I understand the basics of cane making, and I just need to see how someone generally creates the look of a lace cane. The video didn’t waste my time showing unnecessary details and it got right to the point!

The lack of dialogue was not a huge issue for me, but I can easily see how it could be problematic for beginners. For example, I knew to place my cane in the freezer before slicing based on what I’ve learned throughout this learning project, but a beginner cane-maker might not know that! Even without some sort of narration, some text on the screen would have been helpful. It would be nice to be able to hear/read more detailed instructions like “make sure you don’t do X” or “doing Y might help”.

Because of all of this, I wouldn’t recommend this video for someone who has never made a polymer clay cane before, but it is great if you just want a quick rundown of how to make a lace cane.

Building up motivation

I think that this was the kind of push I needed to get myself feeling motivated again. Learning never really seems fun when you feel forced into it. The passion that comes with learning stems from curiosity. In order to improve your skills or knowledge, you have to want to – I mean really want to. If you don’t really want to get better at something, then who are you doing it for? I’m going to keep these ideas in mind as we close in on the learning project in these last few weeks. I need to keep at this project not because I have to, but because I want to.

What do you do when you feel stuck and unmotivated in order to get yourself out of the funk? Let me know in the comments below, or Tweet Me!

Digital Citizenship in the Mathematics Classroom

Too many students go through their schooling where their math classes looked something like this: lecture for the majority of the period, taking notes, working on textbook exercises in the last ten or fifteen minutes, homework throughout the week, and then a test at the end of the unit. It’s about time that we change that.

Digital citizenship is the continuously developing norms of appropriate, responsible, and empowered technology use.

digitalcitizenship.net

When we talk about digital citizenship in the classroom, we usually don’t talk a whole lot about mathematics. Realistically, there is a lot that we can do as math teachers to educate our students about the online world and teach them how to be good digital citizens.

Mike Ribble lists the nine elements of digital citizenship which you can take a look at here. In reference to the Saskatchewan mathematics curricula, let’s discuss how we can integrate some these elements into our math lessons!

Digital Commerce

The use of technology for buying and selling goods online, as well as the tools to assist those handling money in the digital world.

As an Etsy seller myself, my mind instantly goes to a math activity based on it. Consider a problem task similar to the following:

Photo by Karolina Grabowska on Pexels.com

You are thinking about selling your artwork on Etsy.com. You have three drawings that you would like to put up for sale. Etsy takes 5% of each sale you make. You also want to buy a new desk for your art studio which costs $220. If you want to make exactly enough money from your drawings to be able to pay for this desk, how much should you charge for each drawing?

Extension questions: How can you verify your answer? What other factors would affect how much money you make that the question didn’t address?

This problem task connects to outcome N8.2 in the Saskatchewan curriculum for grade 8 mathematics: Expand and demonstrate understanding of percents greater than or equal to 0% (including fractional and decimal percents) concretely, pictorially, and symbolically. The task goes beyond surface level understanding and forces the problem solver to discover the true meaning of a percentage and apply it to a real-life situation. It goes much deeper than a bland exercise such as “find 20% of $80”.

As far as the digital commerce aspect goes, this problem could spark a discussion of how to successfully sell items online. When you are selling items in person, it is easy to just say the item is 20 dollars and then receive a 20 dollar bill, done deal. With selling online, you have to consider the fees of the platform that you are selling on, as well as any potential shipping charges, etc. This problem task is a great opportunity to bring up a conversation with your students about making sure you charge enough on your items in order to cover your costs and still make a profit. You could even take the discussion as far as comparing the pros and cons to selling online – for example, a benefit is that selling online opens up your audience to the entire world!

Digital Communication and Collaboration

The exchange of information in the digital world with intent to educate or express emotions/identity.

As of right now, TikTok is a leading social media app that is still growing in popularity. Many teenagers, if not most, are on TikTok – whether they create content themselves or they are only there to watch others’ content. So, why not incorporate TikTok into the mathematics classroom? I was inspired to come up with this activity by the user @onlinekyne who shares math facts, stories, and riddles! TikTok isn’t just about dancing, there are people who use it to educate others! What if we had our students join in on this?

The fun thing about TikTok is that videos can be no longer than 1 minute in length. Use this to challenge your students! Present them with the following task:

Photo by Julia M Cameron on Pexels.com

Create a video of yourself as if you were teaching someone that is not in our class about a mathematical concept that we have learned this semester. The catch: you only have one minute to get the most important ideas across. Try to be clear in your explanations yet concise. You must also make at least one connection from this outcome either to another mathematical concept you have learned (does not have to be from this class) or to a real-life application. Try to be engaging!

There is a lot of room for creativity with this general activity idea. Essentially, you could use this project to assess understanding of any outcome in any mathematics course. You may have your students choose their own outcomes to work on, or you can assign outcomes to them. A thought: if you decide to assign outcomes to the students, you could choose the outcome that they had the most difficulty with over the course of the semester and they could use this as an opportunity to boost their grade for the outcome!

As an example, let’s take a look at outcome P30.3 from the Saskatchewan Pre-Calculus 30 curriculum: Demonstrate understanding of the graphs of the primary trigonometric functions. The student could give a quick briefing on what a sine and cosine graph is and what it looks like, then connect it to something such as the unit circle or the transformation of functions. For a real-life application, they could connect it to the motion of a pendulum or the continuous rotation of a car tire.

If the student is uncomfortable with making a public TikTok, they could choose not show their face in the video by doing a voiceover on top of pictures or other media, or even use TikTok’s text-to-speech tool. They may also make their account private. Another adaptation is to make a one-minute YouTube video and publish it as unlisted (only people with the link can view it).

This activity shows students that social media can be used to educate others in a positive way. It also gives them the opportunity to practice creating meaningful content.

Digital Fluency

Understanding technology and its use. Being able to discern good information from poor information, real news from fake news, etc.

Fake news is abundant in social media. Even popular news networks can be guilty of sharing false or misleading information – particularly in graphs. It is extremely easy to look at a graph and be convinced of the conclusions that the presenter is claiming, but it is also really easy to slightly alter graphs to make the data look like it means something completely different. This can be done by changing the axes to increase by uneven intervals or starting at a baseline value other than zero; sometimes even just the context in which the data has been acquired can affect the way we analyze a graph. Take a look at this TikTok to see some examples:

@logicsoup

All these graphs contain accurate data points, but the data has just been presented misleadingly. #politics #statistics #graph #biden #leftist #viral

♬ Blade Runner 2049 – Synthwave Goose

This is such an incredible and applicable way to bring digital fluency into the mathematics classroom. Big news companies especially can be very convincing, so it is extremely important that we teach our students how to be digitally fluent and examine such graphs. These types of misleading graphs are very prevalent in popular debates such as climate change, coronavirus cases, and crime/violence rates among People of Color. It is crucial that we educate everyone on how to determine if an argument is valid or not based on the data that they present.

This activity explicitly connects to outcome FM20.7 in Saskatchewan’s Foundations of Mathematics 20 curriculum and indicator e) Support a position or decision relevant to self, family, or community by analyzing statistical data, as well as considering other factors.

I want to hear from you!

What do you think of these activity ideas? Could you see yourself using them in your own classroom? Would you adapt them in any way, and how? I encourage you to take a look at Ribble’s list of digital citizenship elements, and comment any ideas you come up with to connect them to mathematics courses!

The Best and Worst Week of the Learning Project

There’s nothing like using up a bunch of clay (and WHITE clay, at that) during a worldwide shortage only for the design to fail!

I feel like Michael Scott is the best representation of how I felt when I sliced my cane for this week’s learning project.

Last week’s cane was challenging because I was trying to recreate a very specific pattern – leopard print. This week, I was challenged in a completely different way. The pattern I was aiming to create is one that is repetitive and looks continuous when pieces are laid out next to each other. While my end result still met this criteria, it didn’t turn out the way I wanted it to.

I followed a tutorial from Fiona Abel-Smith PolyOriginals to create this week’s cane. When I first came across this YouTube channel, boy oh boy was I intimidated. Fiona’s canes are incredibly intricate and detailed; it is truly amazing. The best (and worst) part is that she makes it look so easy! I watched the entire tutorial and thought “yeah, that’s doable for me”… how naive.

First I began with a skinner blend that had a lot of contrast, like Fiona recommended. Here’s a series of photo collages for you to see how it all came together:

Zero Waste! I chopped up the scraps from the cane to create a marbled slab, which I then cut more magnets out of!

I think that the constant changing of the shape of the cane is what threw me off. First, we start off with quarters of a cylinder, then go to a triangle, then a parallelogram, then back to triangle, back again to parallelogram, and finally square! As I was changing the shape of the cane so much, I started to distort the pattern. What I learned from this is that I’m going to stick with some canes that generally stay one shape throughout and improve my skills of creating more detailed patterns for now before I go on making these crazy shapes.

Now here is what I mean about it being the best and the worst week for the learning project. As far as learning from YouTube goes this week, it was actually what I consider my most successful learning experience so far. I really enjoy Fiona’s tutorials because while they are quite long – between 30 minutes and over an hour – they are extremely thorough and detailed. Her tutorials are done in real time so you can see every single movement she makes to create the cane. She also gives some great tips throughout the tutorial that I found quite helpful. I often feel like some tutorials I watch on YouTube are rushed and skip over important details. Are creators concerned that people won’t watch their video if it’s too long? I’m actually gravitated towards the longer videos since they’re likely to be more detailed.

Even though I was frustrated because the cane didn’t turn out exactly how I wanted it to, my friend Kassia Nameth was able to put a smile on my face by ordering a pair of earrings that I made from last week’s learning project! I always throw in a free magnet with every order, so Kassia got one of the magnets I made from this cane! I wonder if she’ll receive it before she sees this post…

If you’re here from the EDTC crew, how has your learning project been going? Smooth sailing or rough seas? If you’re not from EDTC, tell me your thoughts on YouTube tutorial lengths – do you prefer quick and to-the-point, or lengthy and thorough? Let me know in the comments, or Tweet me!